How to Make Home Made Wine
Let’s face it, enjoying and collecting fine wine is an expensive hobby, especially in light of a tanking economy. My Italian father has only bought a few bottles of “real” wine in a proper wine shop over the years, but he consumes two-three glasses of wine each night. You’re probably asking yourself at this point: well, how does he consume wine if he doesn’t buy any bottles? Well, pappa makes home-made wine and has been doing so for the last 35 years (in the US). My father’s argument for making his own vino centers on: cost, taste, and ritual. That is to say, he can’t stand to spend money on anything he can do himself, enjoys the rustic nature of home-made wine, and enjoys getting his hands dirty (viz., the ritual) every September.
If you’re serious about making your own wine, you’ll probably want to track down someone who has been doing it for a while and ask him/her if they’re willing to act as a mentor. In fact, I would probably recommend going over to the winemaker’s home and just watching for the first year (this way you’ll get a sense of the work involved and maybe get to taste a bottle or two of the wine and ensure that the homemade variety is to your liking <home-made wine is often very earthy and rustic and has a high alcohol content>). Homemade wine will also spoil over time, especially if sulfates are not used.
Basic Equipment and Supplies
If you’ve spoken to a homemade wine expert and tasted (and liked ) home-made wine, you’re now ready to start securing some of the basic equipment and supplies needed to produce wine, including:
- Manual Grape Crusher – this device is used to crush the grapes and extract the first level of juice from the grapes.
- Ratchet Basket Press – a press is used to firmly squeeze any of the remaining juice from the grape and stem.
- 30 Gallon Oak Barrel – you’ll store your wine juice for fermentation in a barrel (some folks use glass or stainless steel, but in my view oak imparts some nice flavor). Note: a used whiskey barrel ought to be cheaper.
- 1-2 Large Plastic, food grade, Drum (with open top) – you’ll use the drums to catch the crushed grapes.
- 1-2 plastic buckets that can fit underneath your ratchet press (for catching the juice)
- 10 inch diameter funnel – with strainer
Grapes

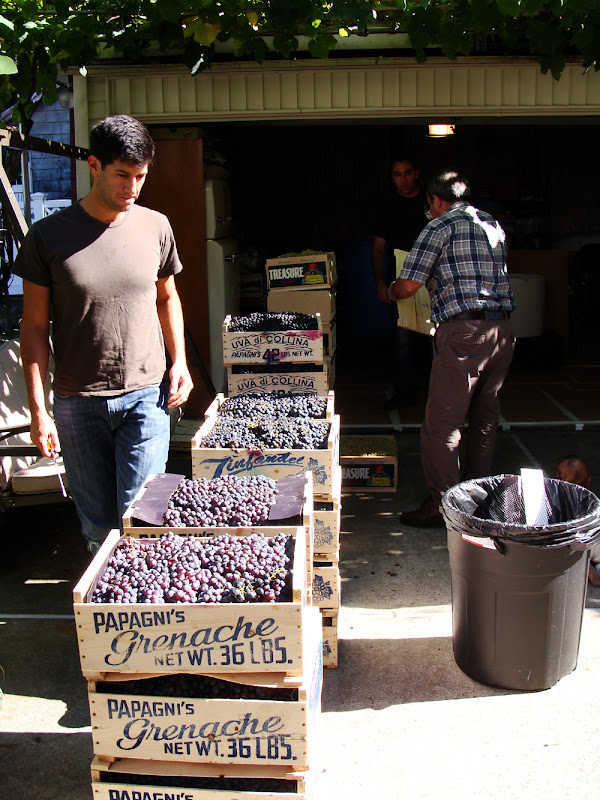
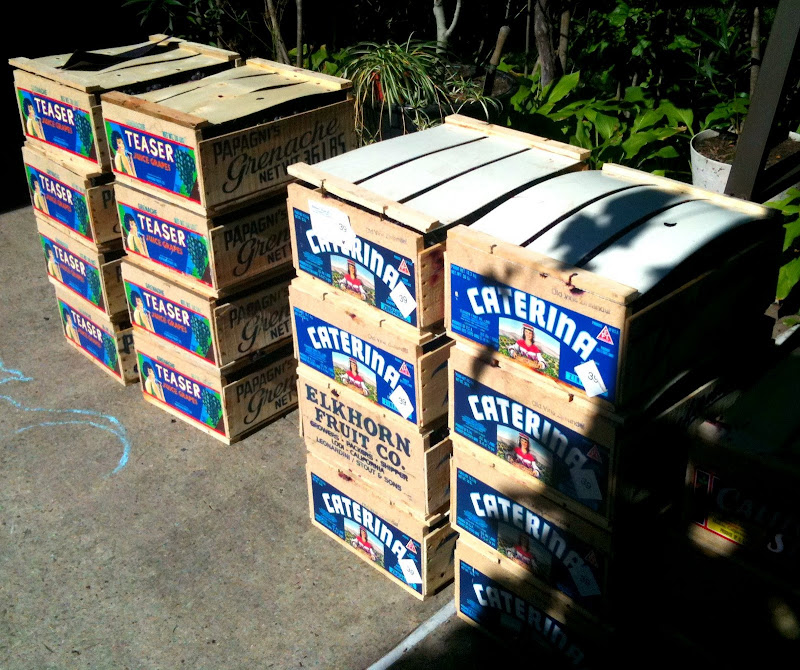
Every winemaker has a different combination of grape varieties they swear on; my father uses a combination of Muscat, Zinfandel, Alicante, etc. (apologies for not divulging the full recipe) Needless to say, make a red variety if you like red and a white variety if you like white. My father’s recipe does have some white varieties in it and in turn he produces a light zinfandel (Rose) type of wine. If you plan on producing 30 gallons of wine then you’ll need about 35-40, 36-42 pound, boxes of grapes. Living on the East Coast we’re privy to a pretty diverse population, so there are quite a few markets that stock grapes from California from September through October.
The Process
Making homemade wine can get dirty so you don’t want to make the stuff in your basement. We like to set up outdoors, preferably in the garage. Grape juice tends to stain make sure to lay some cardboard on your garage floor and wear old clothing. The wine making process is a 1-2 week endeavor with most of the tasks completed in the first week. Here are the tasks and process outlined by day/week:
Day One
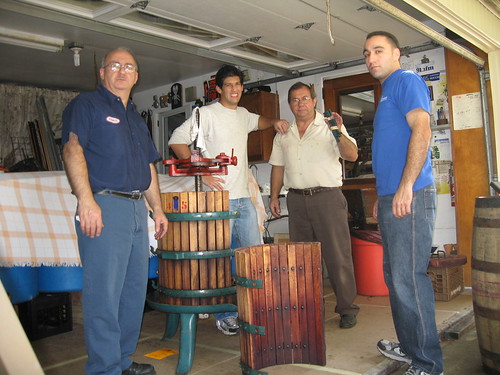
Line up your plastic drums and get a hold of a few milk cartoons so you can place them near the base of the drums (two milk cartons per drum). You’ll need the cartons to stand on so you can get some good leverage while you’re using your crusher. Place the crusher on the opening of the drum. You’ll need at least three men (one to hold the crusher, one to operate the crusher, and one to handle loading the crusher with the boxes containing the grapes). Crushing the grapes via a hand cranked crusher can be difficult so make sure you and your team swap with operating the crusher.
Day Two
Let the crushed mixture sit.
Day Three
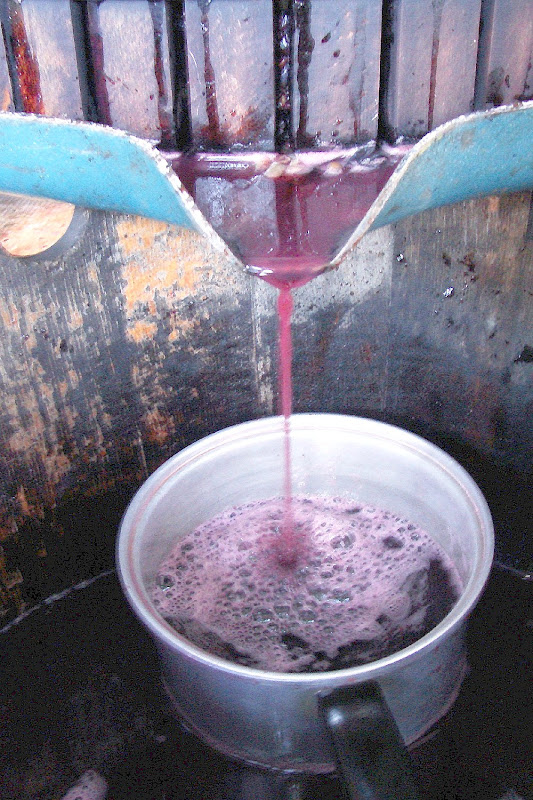
Once the drums are full with the crushed grapes, you’ll want to let the grapes sit for a day or so; this will allow for the juice to settle to the bottom. On day three you’ll want to set up your wine press and begin emptying your plastic drums of the remaining grapes and stems. Load your wine press and gently begin squeezing the stem/grapes (you’ll probably get plenty of juice on the first couple of presses and thereafter the juice will diminish. The newly found juice should be returned to an empty drum. The pressing process will probably last the full day and requires some patience. The remaining grape stems/grapes (which at this point should be void of any juice) can be saved for making grappa (stay tuned for a post on grappa production) or thrown away (if you have a large property you can work into your compost pile).
Day Four
Time to transfer the grape juice to your oak barrel; this step can be messy but it’s all about a large funnel with a good strainer. Use your large buckets to move the juice from the drums to the oak barrel (it’s best to have a second person holding the funnel securely against the barrel opening).
Aging and Last Steps
That’s it, most of the work is complete. You want to wait 5-10 days before plugging your oak barrel, but the majority of work is complete. If you do a search for other wine making techniques you’ll find many more steps (including adding wine yeast, bentonite, potassium metabisulphite, potassium sorbate, fining agents, or sulfates), tools/equipment, racking bottles etc., but the above process has worked for the Scordo family for nearly 35 years (at least here in the States and well over 150 years in Southern Italy).
It’s important that the room housing your oak barrel has a constant temperature (say between 55 – 62 degrees) and that the barrel is not disturbed during the fermentation/aging process. My father lets his wine sit for about 7-8 months, depending upon the temepatuture during the early Spring period. Some folks let their wine age much longer in oak and this is fine if you have a temperature controlled environment or a proper wine cellar (with high humidity and the temperature range above). You can bottle your wine in individual 750 ML bottles (and cork the bottles individually) or find some gallon containers/jugs. Finally, it’s important that every piece of equipment used is extremely clean (so wash everything!).
Final Thoughts:
Over the long run making your own wine is very economical (especially in relation to buying cases of decent bottled wine); of course making your wine will not yield professional results or offer the variety that can be found in a well stocked wine cellar, but it’s a tremendous experience to share wine making with family and friends.
Here are some photos from one of our homemade wine making weekends , including the bottling process.

Aahh, this brings back memories. We went in with some friends to make our own Zinfandel. They had tried a batch of Cabernet a couple of years before and it wasn’t very good–they were ready to try again.
We purchased most of the equipment, rented the hand crank press you show above. We had a series of parties for the various stages of the process, ending in bottling (the first night in screw-cap bottles this time and the second bottling we switched to jugs–more appropriate for how the wine tasted.)
The wine is drinkable, sort of. I guess the good thing is you don’t drink too much of it . . . But is very useful at this time of year, we use a jug of it to baste the holiday turkeys–boy is that gravy good!!!
Needless to say, we still spend a lot of money on wine–the more drinkable kind!
Hi Syd. Funny that you mention wine jugs, we used the same to store our wine!
Making homemade wine is a love/hate type of thing. I really enjoy the process, but wish the end result was better! I use my homemade wine for sauces all the time!
Vince
10 Tips on How to Build a Fire in Your Fireplace
Have you noticed the days getting shorter and the local kids walking to get to their first day of school? Or that the temperature has dropped a bit and you can actually sleep with a breeze coming through your…
Extra Virgin Olive Oil Review and Vittorio Cassini Giveaway Contest
(photo: Latella family olive orchard in outside of Pellegrina, Italy) Images have always played a large role in my life. I still have vivid images in my mind of childhood events like playing hide and seek at dusk on my…
The Wine Press: On The Importance of Italian American Traditions
With the passing of my grandparents, my father and his uncles have moved to sell the first Scordo home here in the United States. The house is full of memories as I spent my first 5 years living in…
Recipe: Pan Simmered Capretto (Baby Goat) with Tomatoes, Onion, Parsley, and Herbs
Feasting on baby goat is a staple of our Italian American Easter and Christmas dinners. Nonna Rosa’s Capretto recipe includes simply roasting a whole baby goat (which is butchered at home or by the local Italian butcher) with: whole crushed…
Un pò d’amore per Scordo.com Fundraiser
(photo: Our cousin Diego in Calabria says, please donate to Scordo.com Vincenzo needs Un pò d’amore!) Un pò d’amore…Scordo.com needs your love. Well, specifically, we’re launching our first ever fundraiser to help off-set the c…
Rite of Spring: Bottling Homemade Wine
(photo: don’t be fooled by the Carlo Rossi gallon jugs, the contents are 100 percent homemade wine)As many Italian Americans can attest to making homemade wine is one of the culturally defining moments of our group. Making and bottling…
How To: Canning Tomatoes For Homemade Tomato Sauce
Along with making our own wine and sun dried tomatoes, my family also cans fresh plum tomatoes every August. The canned tomatoes are used mostly for making tomatoe sauce. Canning your tomatoes produces a better tasting toma…
Hey scordo, i realize this is an old post, but i was wondering if u can tell me, after
Your initial crushing what should i be looking for before i take them to be pressed?
I want to be sure fermintation has taken effect . I want to make w no chemical as you do
But there is not alot of info out there on this chemical free aproach. I want just grape and nature
. If you can shoot me an email i appreciate very much and thank you!!!!
Hello, I am a beginner wine maker. I have all the equipment. Being Sicilian I have a love for wine. I have made strawberry wine and concord grape. I enjoy a heavier wine with sweetness. Can you recommend a grape that would produce this kind of wine. What do you sweeten your wines with sugar syrup or corn syrup, or just naturally with the kind of grape? Can you supply me with a recipe for a simple wine to make. I would really appreciate that. We also have a love for moscato do you have a recipe for that? Kind regards, Carl Bufalo Rockford, IL kesideech@att.net
The photo of jugs brings back such wonderful memories. At the meal, my grandfather would pour his homemade wine into a little juice glass, then set the jug under his chair.
Sincero ringraziamento gente. Se saranno i dettagli po ‘di più questa procedura anche meglio.
Prego, Zak!